
Building a multi-million dollar app in minutes?
Focus on the process, not the tool


Focus on the process, not the tool
11:30 AM, BREAKING NEWS: Figma announces Figma AI—the crowd goes wild!
11:35 AM, UPDATE: Figma withdrawals feature due to a potential lawsuit over designs that looked like the Apple weather app.
That was quick!
And to be honest, Figma AI has been around for more than a year now, and it’s mostly useless, generating mind maps that don't make a lot of sense. Figma’s AI announcement was mainly a marketing thing.
For me, the lesson here is to never fall in love with a tool (looking at you Invision), but rather, focus on a process. So that’s what I did when I decided to tackle the project outlined below.
No-code + AI = code!
I’ve been building no-code apps for a few years now. But recently, I thought about how AI is set to change the app design process, and I decided to branch out a bit—from pure no-code to no-code + AI-generated code.
Yes, it is possible to create viable, working apps using AI-generated code. Here’s what I did and learned how to use Claude’s new Artifacts feature along the way.

Creating an AI dermatology app
One day, while pondering the intersection of healthcare and technology, an idea struck me: what if we could leverage AI to help people assess potential skin issues from the comfort of their homes? What if I could build an MVP for this?
I set out to build DermaLog, a skin analysis app that would use OCR (Optical Character Recognition) and AI to analyze images of skin conditions. So users simply upload a picture of a skin irregularity and get back a likely condition.
And remember—I don’t code, at all. Sounds like a daunting task? That’s what I thought too… at first.
Here are the steps I took.
Step 1: initial prompts
I started with Claude, an AI language model developed by Anthropic. I began with a simple prompt, typos and all:
"I want to create a python app that is based on OCR library that could take an image of skin and then use the api of open ai in order to analyze if there is any skin issue in that picture and medically analyze it. Then I need the option to prompt the data to a doctor if there is anything suspicious or not so I need it to tag it as dangerous or not dangerous. For now, tell me the architecture of it."
Claude's response was comprehensive, outlining the main components of the app, suggesting libraries to use, and even proposing a database structure. This initial interaction set the stage for our collaborative development process.

I followed this with a second prompt: “Let’s do it!”
Step 2: setting up the Flask application (what the heck is Flask?)
The development process unfolded through a series of prompts and responses. At one point, Claude casually mentioned that I should use Flask.
OK, that’s cool. But, "What is Flask?" I asked.
Claude provided a concise explanation (it’s a web framework). With this new knowledge, I prompted Claude to generate the necessary code for the basic Flask application structure. I then copy/pasted the code for these files:
run.py
init.py
routes.py
As we progressed, my prompts became more specific:
"Change the name to DermaLog. Make sure to create these colored tags based on how dangerous the findings are. Make sure to add % of what it might and how accurate the results are to be and add different suggestions to it if possible."
Claude responded with updated HTML and Python code, incorporating these new features and design elements.
By the end of our initial development session, what started as a vague idea had evolved into a functional prototype for DermaLog.
I had a clear understanding of the app's structure, its key features, and even some insights into potential future improvements.
As I prepared to refine and test the app further, I couldn't help but marvel at how AI had enabled me to bring my idea to life without writing code myself.
I had crossed the threshold and stepped into the world of app development democratization.
Step 3: image upload and AI analysis
I asked Claude how to create a form for users to upload images. It spit out both HTML and Flask route code, which I copied directly into my project.
OCR Processing: When Claude suggested using Pytesseract for OCR, I said, “Claude, if I didn’t know what Flask was, do you really think I know what Pytesseract is? I can’t even pronounce that!”
OK, I didn’t really say that—I just asked for clarification on what OCR was and how to implement it. Again, I copied and pasted the code Claude generated.
For the image analysis, we initially attempted to integrate the OpenAI API, but encountered persistent issues. When I shared these problems with Claude, it suggested using its own API instead. Jealous much, Claude?
This led to a significant pivot in the approach, and I had to ask Claude to generate entirely new code for this integration, which I again pasted into the app's code.
For result classification, the system was also entirely generated by Claude based on my description of what I wanted (categories like: Safe, Needs monitoring, Potentially dangerous).
Step 4: enhancing the UI
For the UI, I described to Claude what I wanted, and it generated the HTML and CSS for the homepage and the results page.
Step 5: overcoming challenges
Developers know that debugging is a huge part of the job. Good thing Claude can debug too!
E.g., when I shared a "TemplateNotFound" error, it guided me through debugging steps, correcting the code.
Same thing for persistent problems with API authentication. It took a few passes, but Claude fixed those too. It even cleaned up the Python indentation errors, which it turns out are a thing. (Did I mention that I don’t code?)
Step 6: adding advanced features
Even as we added more advanced features, our partnership of director and coder remained intact.
For example, I asked Claude how to add a WhatsApp link, and it provided the HTML code. I added Percentage Likelihood and Accuracy Assessment features too, which again were created by prompt-generated code.
At this point, it should be clear that my role was nothing at all like that of a traditional developer. Instead, I was more of a project manager, outlining requirements, asking questions, and making decisions about the app's direction.
Claude served as both teacher and coder, explaining concepts, generating code, and solving problems.
Step 7: testing
I asked Claude, "How do I run the Flask app and test it?" Claude provided me with the command:
python run.py
I copied this into my terminal, and to my surprise and delight, the app started running on my local machine. However, this was just the beginning of our testing process.

That’s how the copy/paste terminal looked like, everyone have this one their mac.
Step 8: more bugs
As I started interacting with the app, I encountered several issues: image upload problems, OCR functionality, and API issues. Claude handled them like a boss, e.g. suggesting I update the API key and modify the request headers. Each suggestion came with code snippets. Copy, paste, fixed!
Step 9: more UI improvements
As the core functionality stabilized, I turned my attention to enhancing the user experience:
Error handling: I asked Claude how we could provide better feedback to users when something goes wrong. It suggested implementing Flask's flash messages and provided code to display these messages in our HTML templates.
Loading indicators: To improve perceived performance, I asked Claude how to add a loading spinner while the image is being analyzed. As expended, it provided HTML, CSS, and JavaScript to implement the feature.
Responsive design: I noticed the app didn't look great on mobile devices. Claude gave me additional CSS to make the design responsive, which I added to our stylesheet.
Step 10: refining the AI analysis
To improve the accuracy and usefulness of DermaLog's analysis, we made several iterations:
Adjusting prompts: I experimented with different prompts for the Claude API, asking the AI assistant to help me craft more effective instructions for skin analysis. We went through several iterations, fine-tuning the language to get more detailed and accurate responses.
Implementing confidence levels: I asked Claude how we could include confidence levels in our analysis. It suggested modifying our API call and results parsing to include this information, providing the necessary code changes.
Adding disclaimers: On Claude's suggestion, we added a disclaimer to remind users that the app's analysis is not a substitute for professional medical advice. Claude provided the text for this disclaimer and the code to display it prominently in the app.
Step 11: performance optimization
As a final step, I asked Claude about ways to optimize the app's performance. It suggested several improvements:
Image compression: Claude provided code to compress uploaded images before analysis, reducing API call times.
Caching: We implemented basic caching for API responses to improve performance for repeated analyses of the same image.
Asynchronous processing: Claude suggested and provided code for implementing asynchronous processing of image uploads and API calls, improving the app's responsiveness.
This iterative process of testing, identifying issues, and implementing solutions allowed me to significantly refine and improve DermaLog.
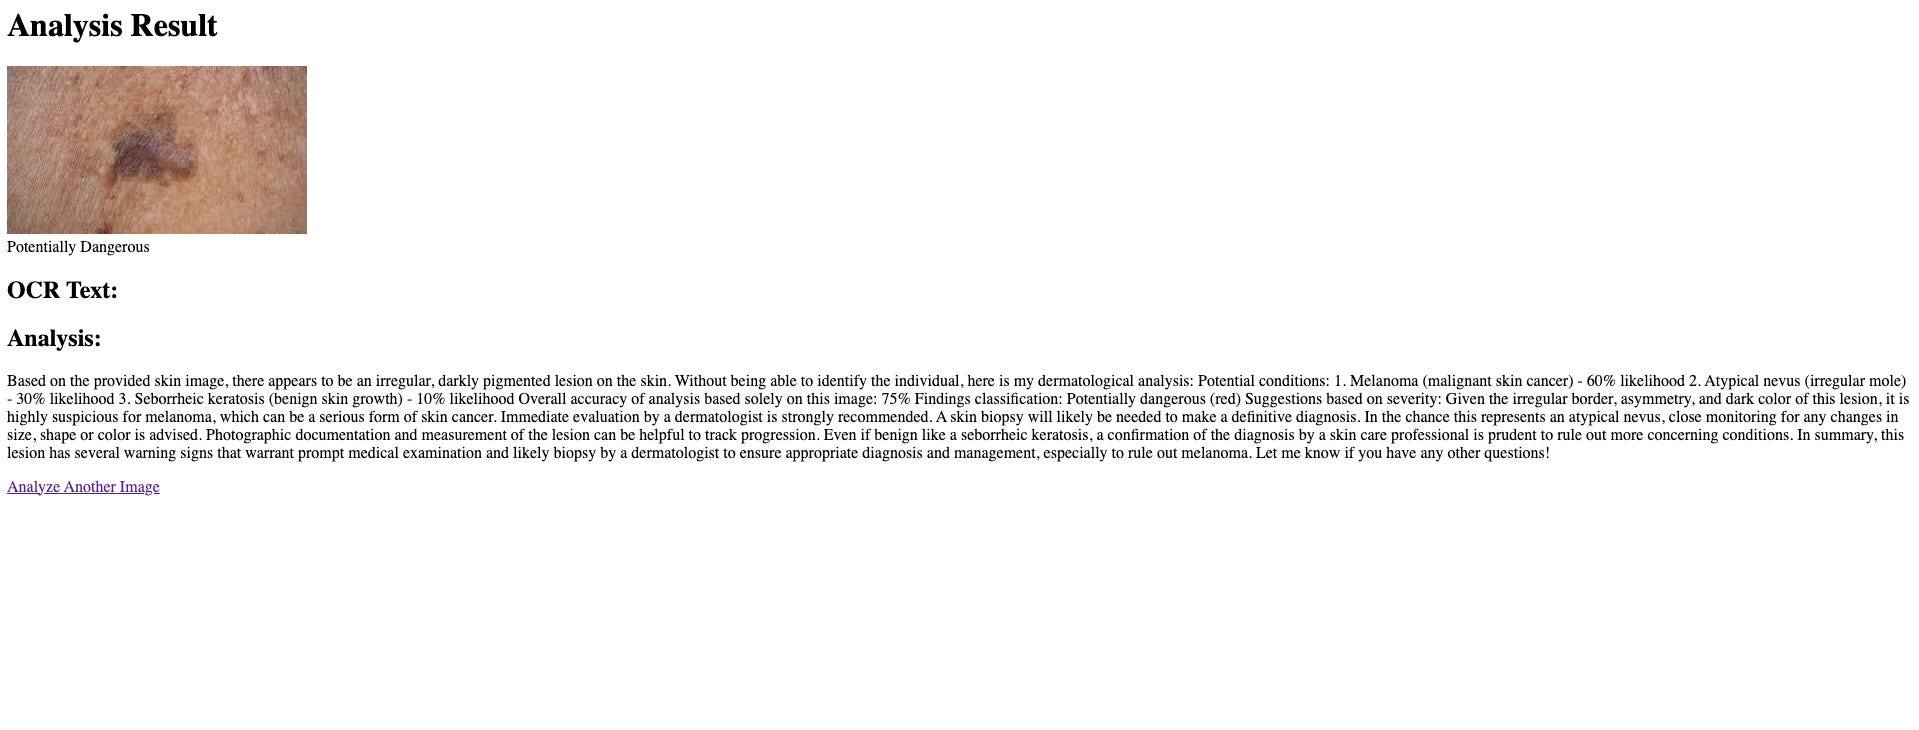
Meet DermaLog
Guess you probably want to see it by now.


Believe me, I’m not trying to say this app is perfect and ready to be used as-is. But it does show what’s possible with AI-generated code, even if you have no clue about coding.
Turns out that a heck of a lot is possible!
DermaLog serves as a proof of concept. It's perhaps enough to get buy-in from clinics and attract investment to develop a more comprehensive, secure, and accurate product.
And it was all done in the span of a few hours while holding a one-month-old baby in my lap.
It’s your turn
So, who among you is brave (or crazy) enough to embark on a similar journey? What are your ideas for apps that could be rapidly developed using AI-generated code?
Send me a link to anything you create in a similar process (and how you did it) and I’ll feature it in an upcoming edition.
Happy coding… err, I mean, happy prompting!
This is a mind-blowing one